Appearance
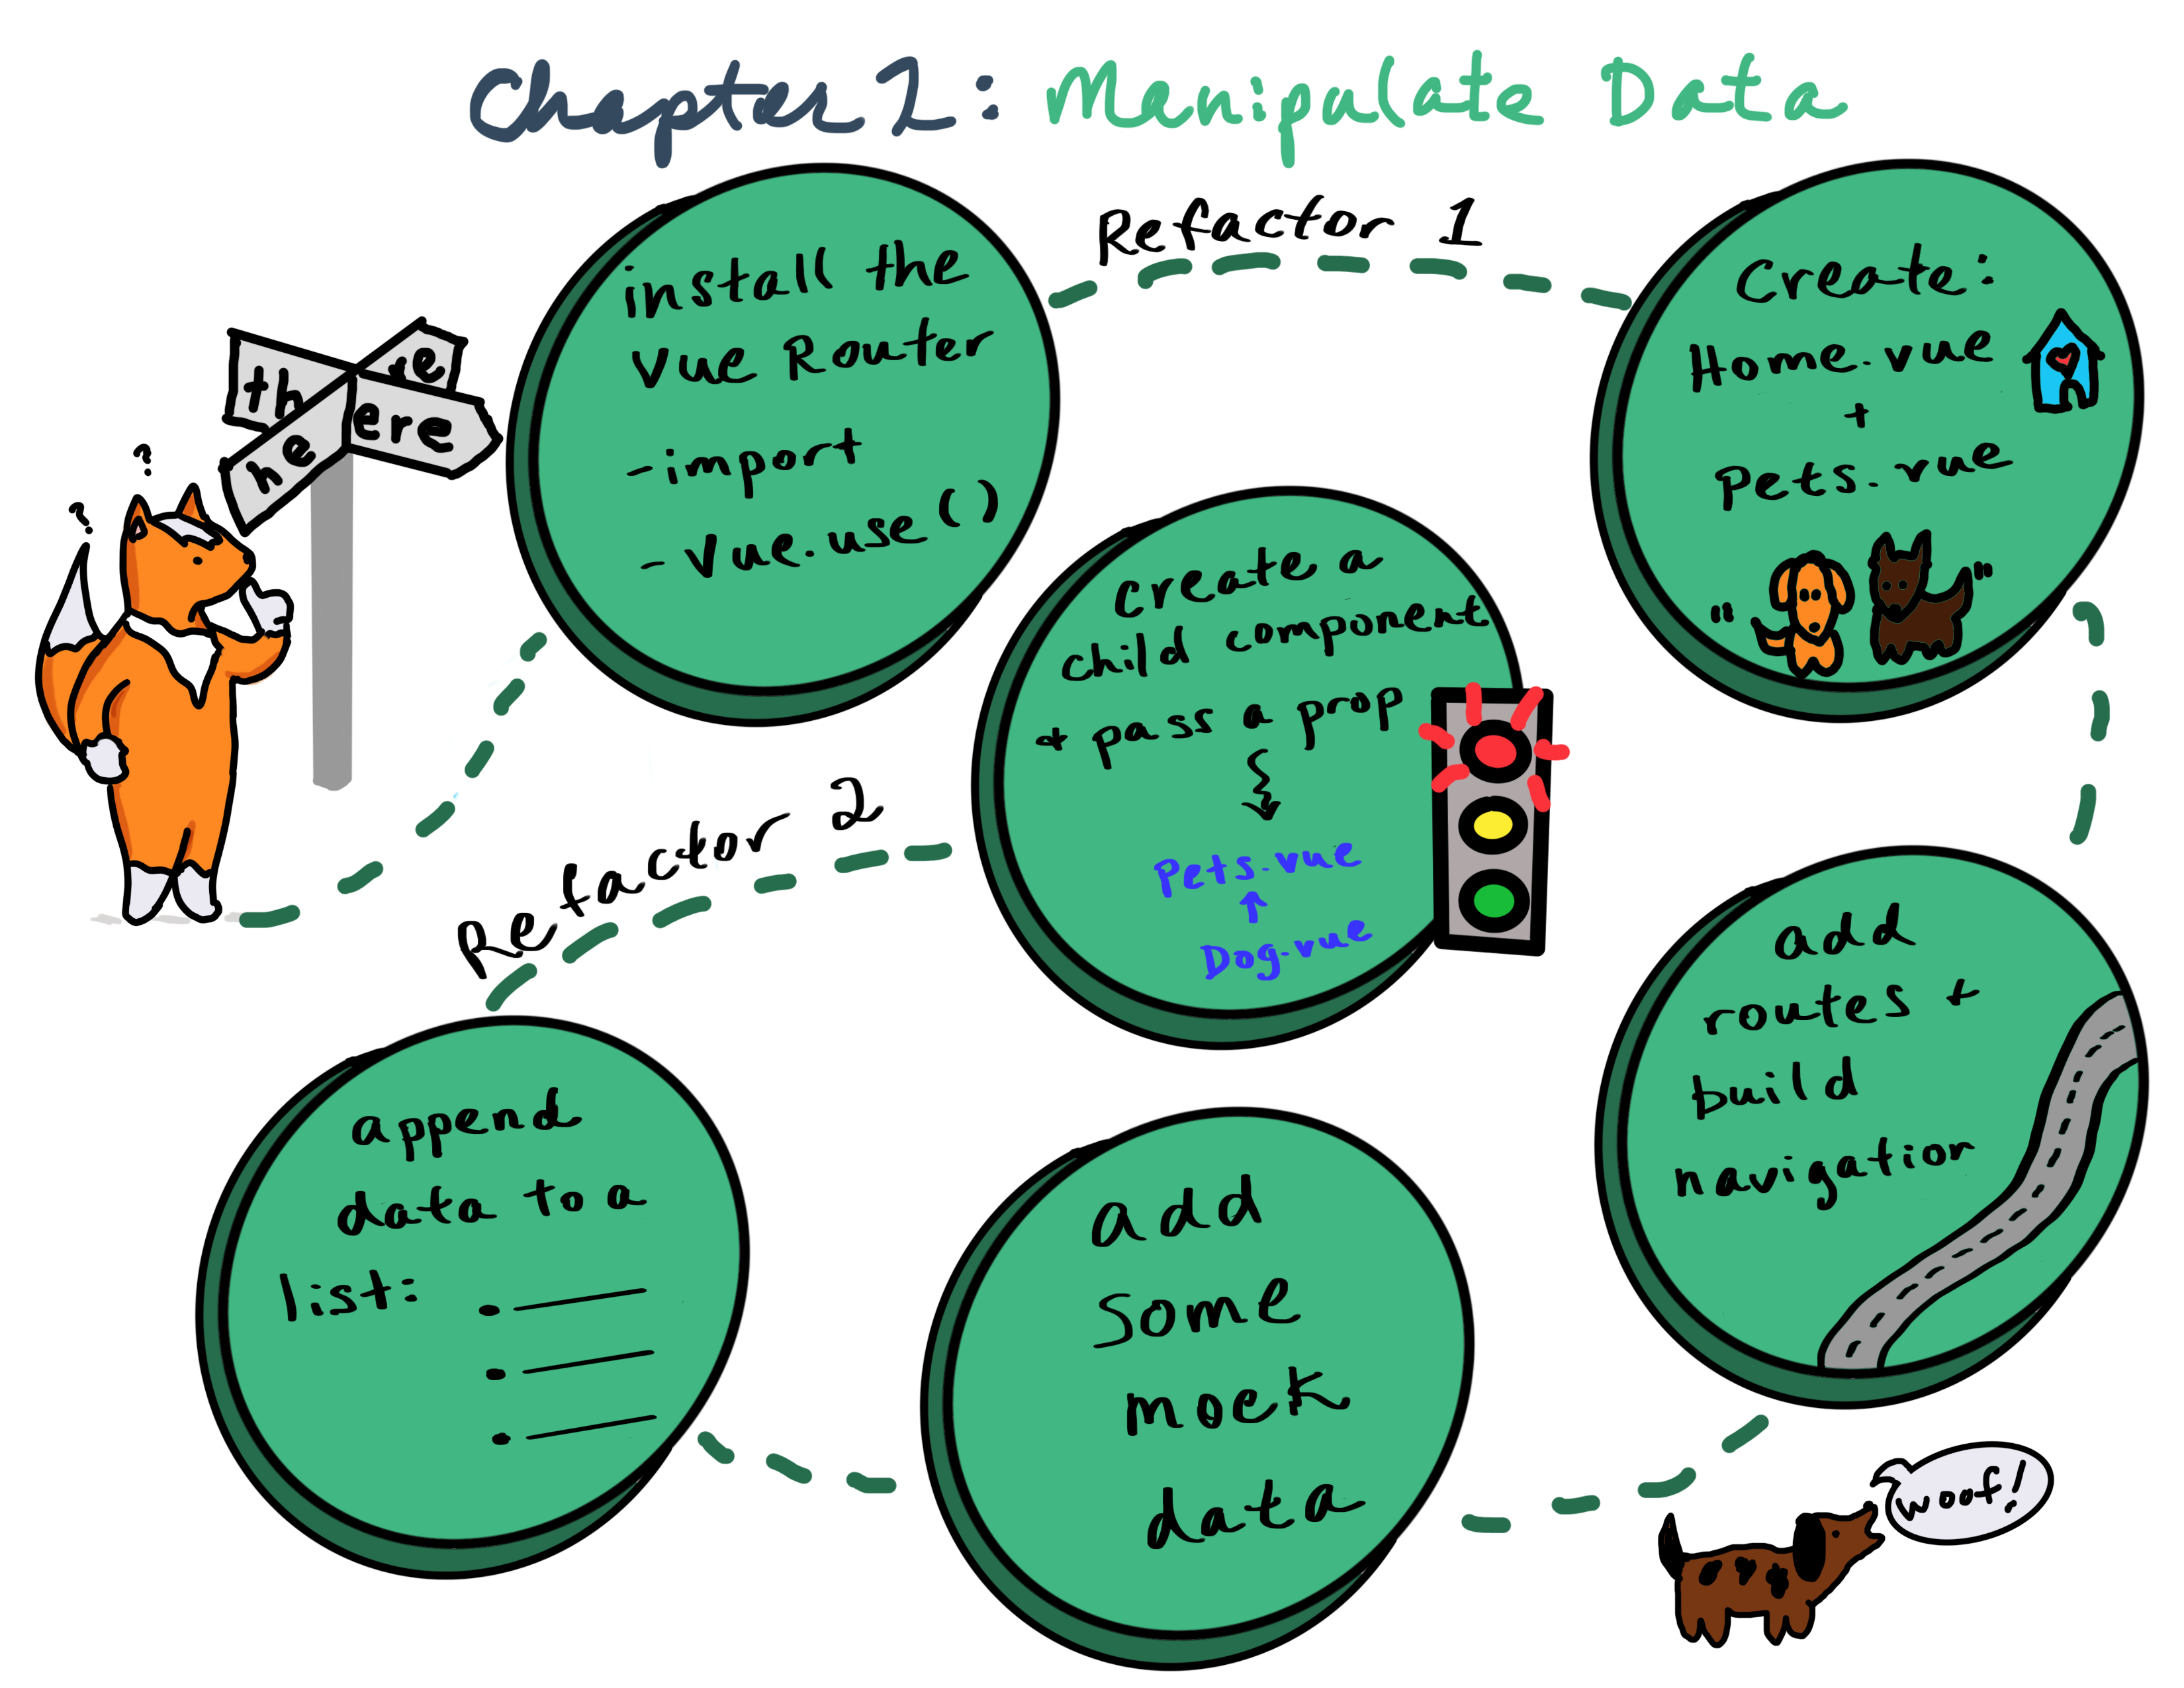
📋 Chapter 2: Build a Pet Gallery
| Project Goal | Learn how to manipulate data in a web app |
|---|---|
| What you'll learn | Using static data, you'll build a card interface to show many adoptable dogs |
| Tools you'll need | A modern browser like Chrome. An account in CodeSandbox.io. If you get lost, import the starting point for this chapter here. Instructions on how to do this are in Appendix 1 |
| Time needed to complete | 1 hour |
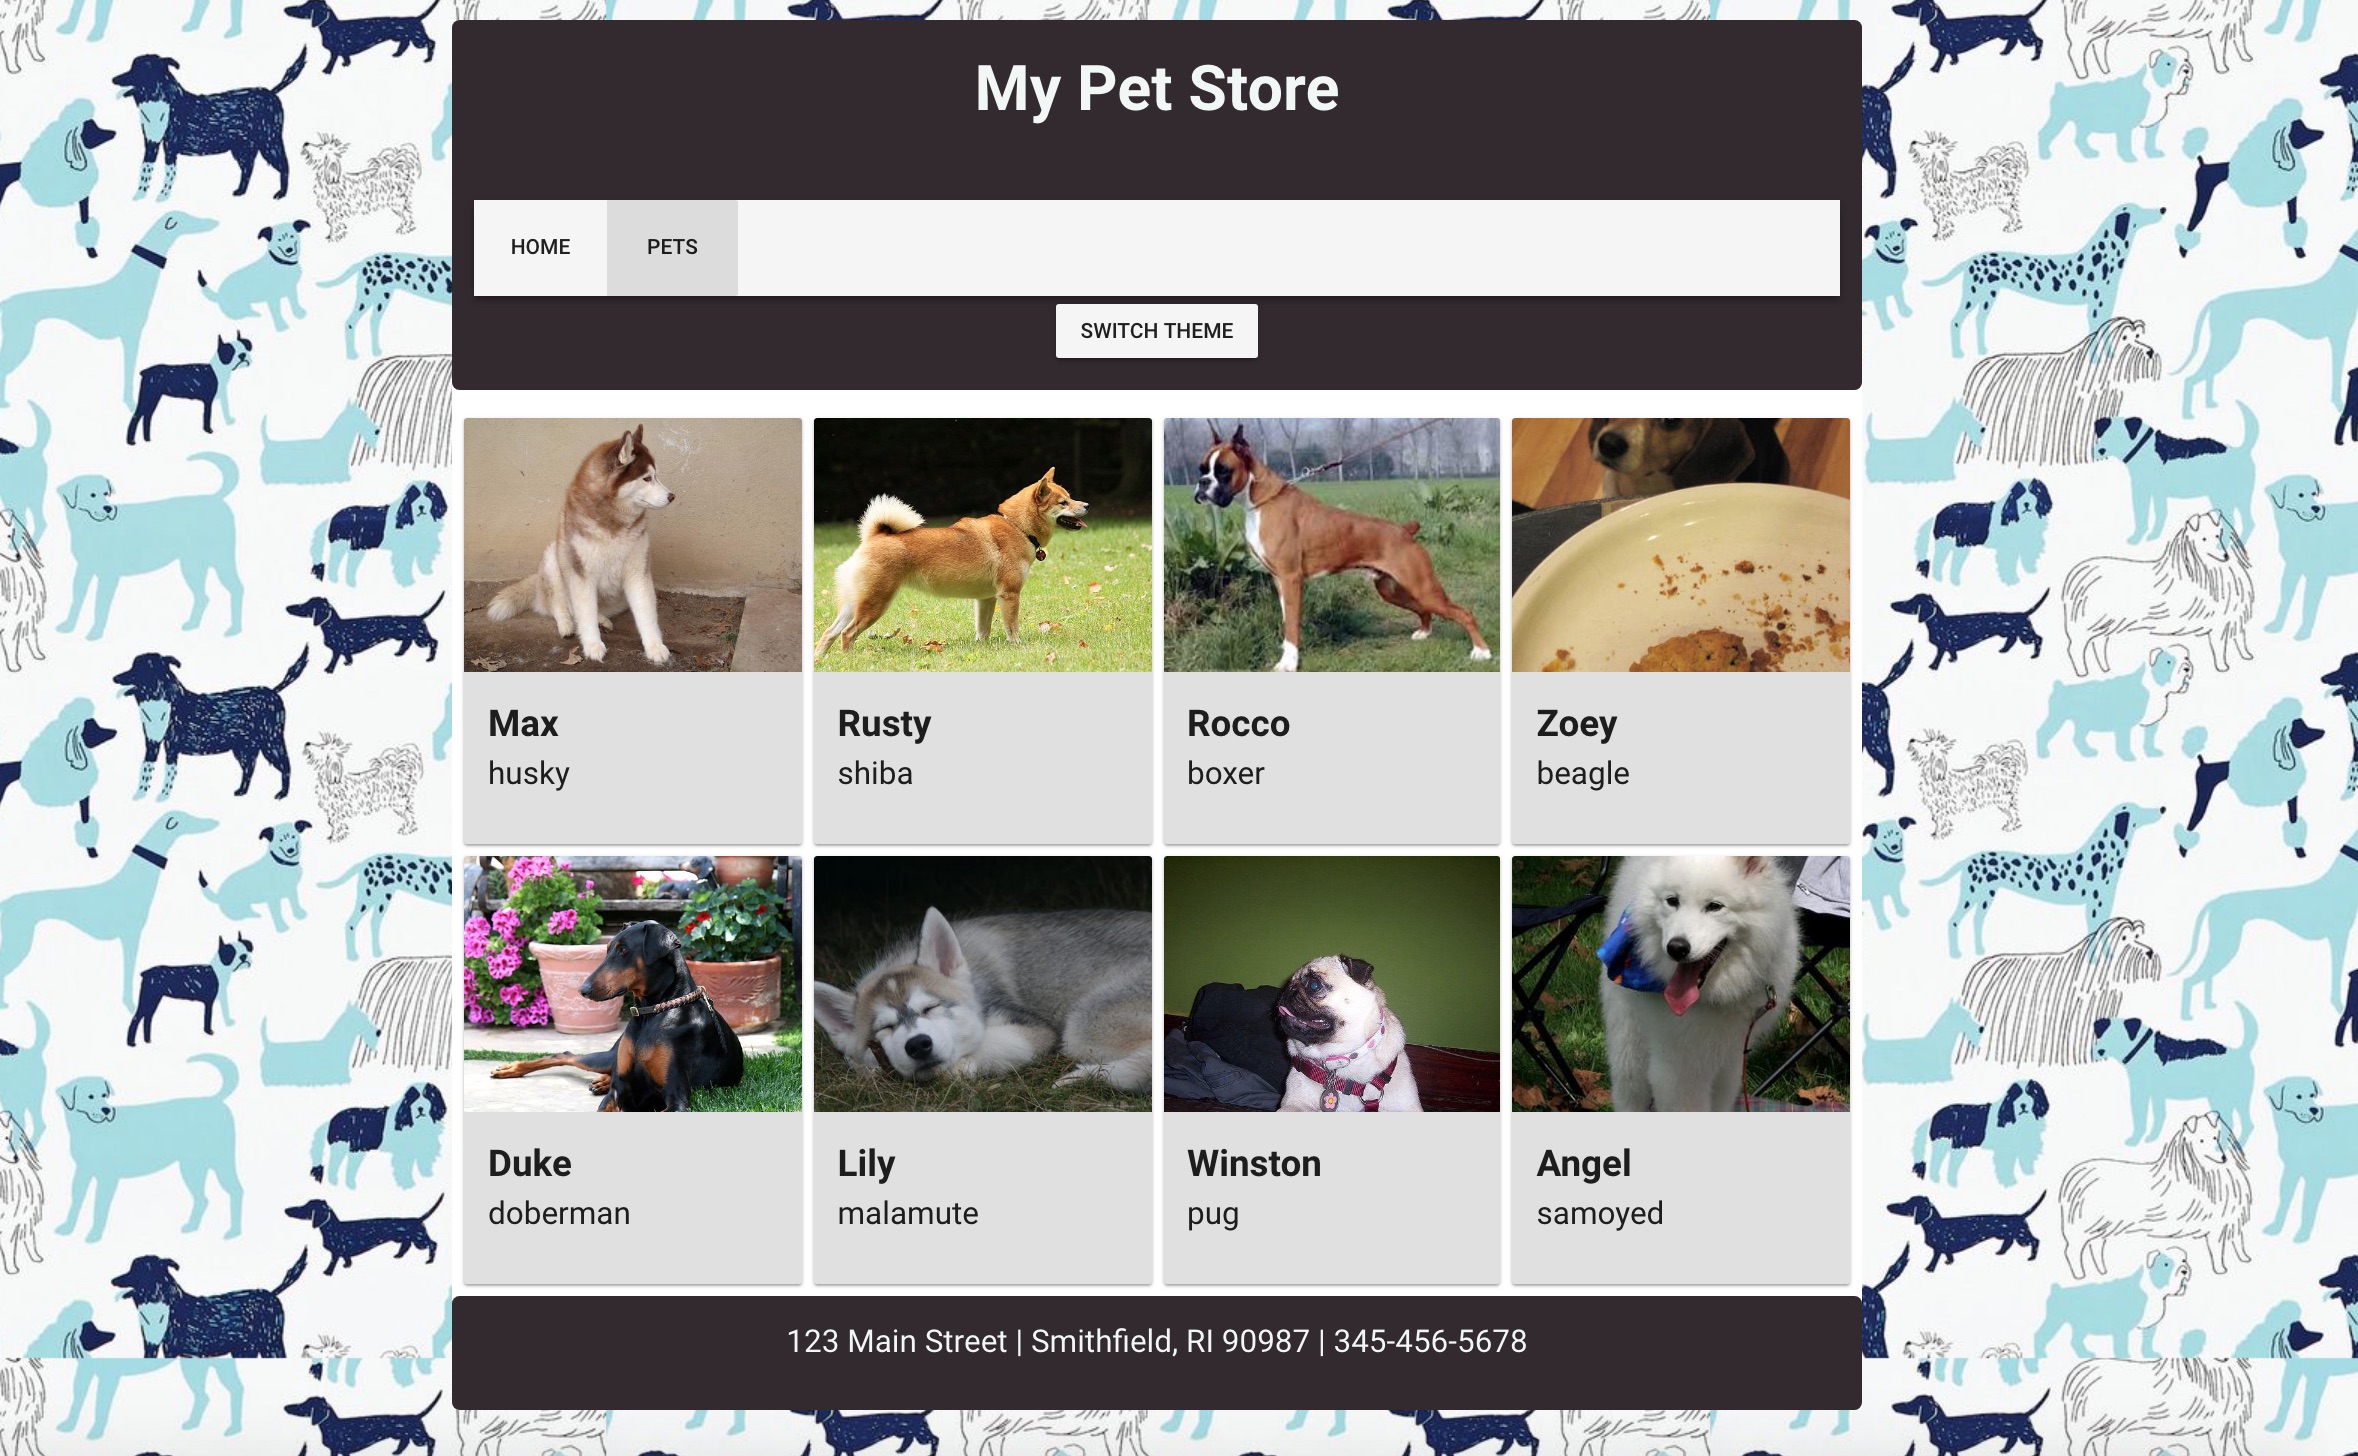
What You'll Build
Instructions
If you need to restart your project, clone this repo into Code Sandbox by clicking on the Import from GitHub link on the bottom left of the main page, and then pasting the repo's url into the fields. You can also continue with the project you've created in chapter 1.
At this point, we have only a home page, but we want to add one more page to contain pet cards. Let's create a single-page application with a navigation bar listing "home" and "pets". Clicking on the "pets" page will bring us to the new page we're creating now and "home" will open the page we've created in chapter 1.
💡
"A single-page application (SPA) is a web application or web site that interacts with the user by dynamically rewriting the current page rather than loading entire new pages from a server" (Wikipedia)
To create our SPA with Vue, we need to use the vue-router. The vue-router is Vue's official router (the library that makes moving from page to page easy and efficient). It's specifically designed to work with SPAs, which have some special requirements like nested routes and passing data over the router. Add it to your app's dependencies (click the Add Dependency button and search for vue-router), and install it (like we did earlier with Vuetify). You can see it has been added in the dependencies object in our package.json.
The Router
Open main.js file and import vue-router:
js
import VueRouter from 'vue-router';You should now have 4 import lines:
js
import Vue from 'vue';
import App from './App.vue';
import vuetify from '@/plugins/vuetify';
import VueRouter from 'vue-router';1
2
3
Now we need to use the plugin by calling the Vue.use() global method in our main.js:
js
Vue.use(VueRouter);Add this line before new Vue(...) to ensure that any new instance of Vue that we create will use vue-router. If you would add the line behind new Vue(...), our app would not have vue-router available.
💡
Stop and think about our app's architecture. In our application, the header and footer will be present on each page and the content between them will change. To accomplish this, the component matched by the route will be rendered inside a <router-view> tag which we will add later. Because the header and footer of our app should always be visible, we can keep them in App.vue and the content of specific pages will be moved into separate components. We need to move away from having all our app's parts in App.vue, so we need to do some refactoring.
Create the Home Page
Let's create a separate component for all the elements contained in <div class="wrapper">.
Go to the
viewsfolder insrc(create it if it doesn't exist) and create a file calledHome.vue.Add a
<template></template>tag to this new fileGo to the
App.vuefile. Copy the<div class="wrapper">and all elements inside it and paste it inside the<template>block inHome.vue. This is all the code between the<header>and<footer>tags. Delete that code fromApp.vue.
You will see that now your app looks a bit empty but no worries, we will add it later back in.
Create a Pets Page
Now, let's create a Pets.vue page. In src/views, like you did for the Home.vue page, create a Pets.vue file. Add a layout that will use the Vuetify card styling:
vue
<template>
	<v-container grid-list-md fluid>
		<v-layout wrap>
			<v-flex xs12 sm4 md3>
				<v-card color="grey lighten-2">
					<v-img src="https://goo.gl/6CQNDo" height="170px"></v-img>
					<v-card-title>
						<div>
							<h3>Looking for a dog?</h3>
						</div>
					</v-card-title>
				</v-card>
			</v-flex>
		</v-layout>
	</v-container>
</template>

<style scoped>
	p {
		margin: 0;
	}
</style>1
2
3
4
5
6
7
8
9
10
11
12
13
14
15
16
17
18
19
20
21
Add the Routes
Great, now we have separate components for our home and pets pages! You'll notice however that the content doesn't yet show up in the app. We have to make routes for these pages.
- Let's go back to
main.js. First, let's import our new components under the list of imports at the top:
js
import Home from './views/Home';
import Pets from './views/Pets';1
- Now we can create routes. Each route is an object specifying a path and a component which will be rendered in this path. Let's add two routes: one is for our homepage and one for pets. Add this code under the
Vue.use...lines:
js
const routes = [
	{
		path: '/',
		component: Home,
	},
	{
		path: '/pets',
		component: Pets,
	},
];1
2
3
4
5
6
7
8
9
- Now we have to create a
VueRouterinstance and pass our routes object to it. Add this line below theconst routesobject you just pasted in:
js
const router = new VueRouter({ routes });- Finally, we need to add the router to our Vue instance. To do this, just add a reference to
routerinside of thenew Vueconfiguration object:
js
new Vue({
	vuetify,
	router,
	render: (h) => h(App),
}).$mount('#app');1
2
3
4
- Now open App.vue. Replace the whole
<div class="wrapper">chunk that you ripped out with a<router-view></router-view>tag, sandwiching it right between the header and footer. Your store just came back to life!
Test your progress. Add /pets at the end of the URL string in the address bar. Now you can see the Pets component instead of Home!
Add Navigation
To make our navigation easier we will create a simple navigation bar using Vuetify, which we already implemented in Chapter 1.
The toolbar component in Vuetify is called v-toolbar. Let's add it in App.vue right below the h1 tag in our header:
vue
<v-toolbar>
	<v-toolbar-items>
		<v-btn to="/" text>Home</v-btn>
		<v-btn to="/pets" text>Pets</v-btn>
	</v-toolbar-items>
</v-toolbar>1
2
3
4
5
You can see two buttons in this toolbar. Each of them has a to attribute: it's a router-link to a certain route. Now we can easily switch between pages - give it a try by clicking the buttons.
Ok, fine, but there are no pets, so let's add some!
Build up some data
We're going to add some dummy data in a new folder called data. Create that folder in src and add a blank file called dogs.js. Paste in the following JSON object:
js
export const Dogs = [
	{
		name: 'Max',
		breed: 'husky',
		img: 'https://images.dog.ceo/breeds/husky/n02110185_1469.jpg',
	},
	{
		name: 'Rusty',
		breed: 'shiba',
		img: 'https://images.dog.ceo/breeds/shiba/shiba-13.jpg',
	},
	{
		name: 'Rocco',
		breed: 'boxer',
		img: 'https://images.dog.ceo/breeds/boxer/n02108089_14112.jpg',
	},
	{
		name: 'Zoey',
		breed: 'beagle',
		img: 'https://images.dog.ceo/breeds/beagle/n02088364_11136.jpg',
	},
	{
		name: 'Duke',
		breed: 'doberman',
		img: 'https://images.dog.ceo/breeds/doberman/n02107142_4653.jpg',
	},
	{
		name: 'Winston',
		breed: 'pug',
		img: 'https://images.dog.ceo/breeds/pug/n02110958_15626.jpg',
	},
	{
		name: 'Lily',
		breed: 'malamute',
		img: 'https://images.dog.ceo/breeds/malamute/n02110063_1104.jpg',
	},
	{
		name: 'Angel',
		breed: 'samoyed',
		img: 'https://images.dog.ceo/breeds/samoyed/n02111889_4470.jpg',
	},
];1
2
3
4
5
6
7
8
9
10
11
12
13
14
15
16
17
18
19
20
21
22
23
24
25
26
27
28
29
30
31
32
33
34
35
36
37
38
39
40
41
It exports one const, Dogs, containing all the data we need.
- Let's import this data into our pets component. Go to the
Pets.vuefile and add the following script block under the<template>block:
vue
<script>
import { Dogs } from "../data/dogs";
export default {
	data() {
		return {
			dogs: Dogs
		};
	}
};
</script>1
2
3
4
5
6
7
8
9
This script ensures that the array dogs is a part of Pets component's state and can be used in our template. Next we will extend our template so we can show the data from this dogs array.
Append the Data to a List
Now we want to make a list of dogs. The easiest way to do this is to loop over an array and append data to a list. Our dogs are an array, so it's ready to be appended. To render a list of items based on an array, Vue has a v-for directive. This will iterate through this array and render each item.
Let's add this directive to our v-flex element in Pets.vue:
vue
<v-flex xs12 sm4 md3 v-for="pet in dogs" :key="pet.breed">
	<v-card color="grey lighten-2">
		<v-img :src="pet.img" height="170px"></v-img>
		<v-card-title>
			<div>
				<h3>{{ pet.name }}</h3>
				<p>{{ pet.breed }}</p>
			</div>
		</v-card-title>
	</v-card>
</v-flex>1
2
3
4
5
6
7
8
9
10
To properly loop and append, you need to provide a unique key attribute for each item. In our case, the dog's breed will be the key.
Inside the v-for directive our current dog will be called a pet.
💡
Remember, we chose this name inside the directive; if we had written v-for="dog in dogs" each item will be called dog).
Refactor the template - create a Prop!
Create a new folder inside the src and name it components.
Inside the components folder we will create a new file and name it Dog.vue. Open this file and add the following code:
vue
<template>
	<v-card color="grey lighten-2">
		<v-img :src="dog.img" height="170px"></v-img>
		<v-card-title>
			<div>
				<h3>{{ dog.name }}</h3>
				<p class="breed">{{ dog.breed }}</p>
			</div>
		</v-card-title>
	</v-card>
</template>

<script>
export default {
	props: {
		dog: {
			type: Object
		}
	}
};
</script>

<style scoped>
	p {
		margin: 0;
	}
</style>1
2
3
4
5
6
7
8
9
10
11
12
13
14
15
16
17
18
19
20
21
22
23
24
25
26
Now let's update our Pets.vue component to use the new Dog component:
vue
<template>
	<v-container grid-list-md fluid>
		<v-layout wrap>
			<v-flex xs12 sm4 md3 v-for="pet in dogs" :key="pet.breed">
				<app-dog :dog="pet"></app-dog>
			</v-flex>
		</v-layout>
	</v-container>
</template>

<script>
import { Dogs } from "../data/dogs";
import Dog from '../components/Dog.vue';

export default {
	components: {
		appDog: Dog
	},
	data() {
		return {
			dogs: Dogs
		};
	}
};
</script>1
2
3
4
5
6
7
8
9
10
11
12
13
14
15
16
17
18
19
20
21
22
23
24
You should now have a super card layout of dogs! Chapter 2 is completed!
Final result